
Winterizing an Inground Pool With a Slide and Water Feature on the Same Pump
Closing a pool with a slide and water feature on the same pump takes more than the standard blowout routine. This guide walks through every line, valve, and low point so nothing cracks over winter. Get exact steps for draining, blowing out, and protecting shared plumbing.

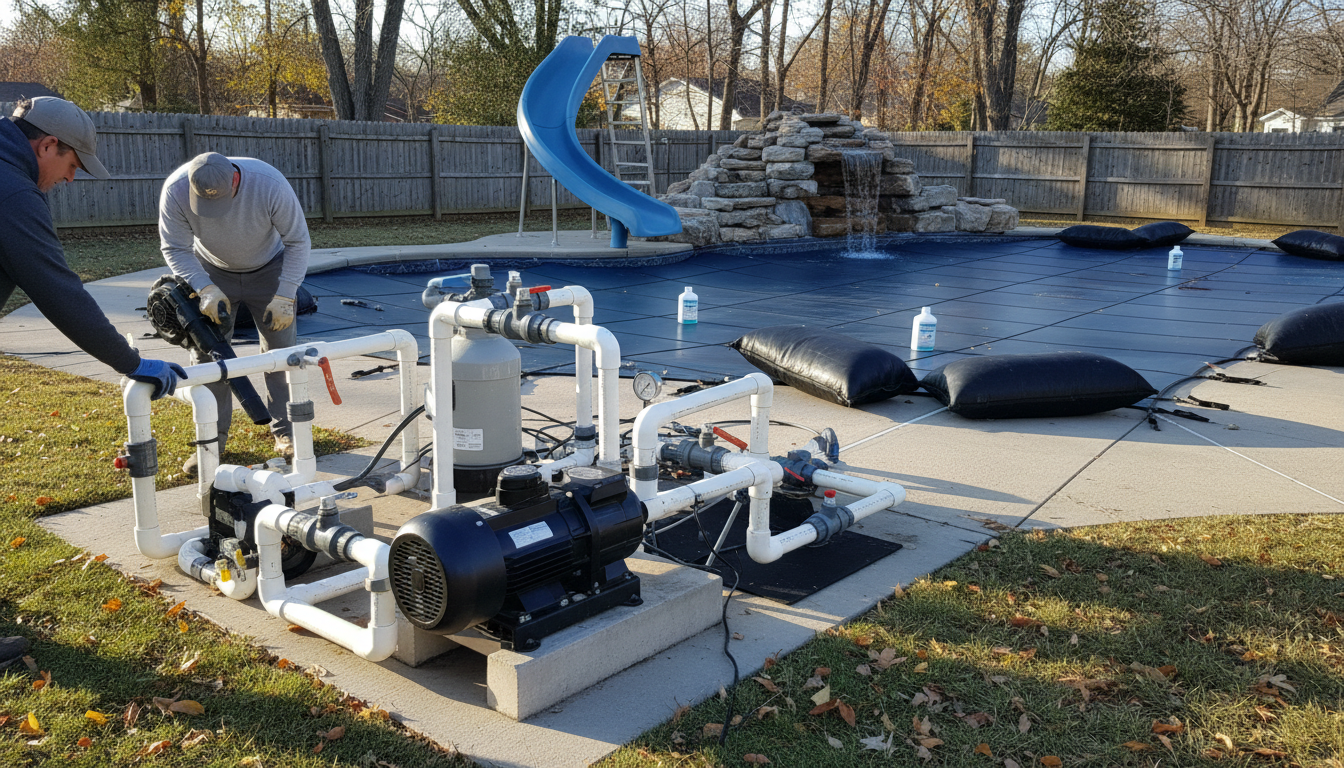
Winterizing an Inground Pool With a Slide and Water Feature on the Same Pump
Closing a pool that shares one pump between a slide and a water feature is not the same job as a standard inground pool winterization. You have extra lines running uphill, diverter valves splitting flow in multiple directions, and low points in the plumbing that a basic blowout will completely miss. If even a small pocket of water survives the winter in a slide feed pipe or a waterfall manifold, you are looking at a cracked fitting or a split pipe come spring.
The core answer is this: treat every line fed by that shared pump as its own independent system, blow each one out separately, plug every port, and follow up with antifreeze in any line you cannot guarantee is bone dry. The sections below walk through the full sequence, including how to handle the diverter valves, how much antifreeze to use, and the mistakes that catch pool owners off guard every fall.
Why a Shared Pump Setup Needs Extra Attention
A single pump serving a slide, a water feature, and the main pool returns sounds efficient during swim season. At closing time, though, that shared plumbing creates a web of branches, and each branch traps water differently. The main return lines are mostly horizontal or slightly downhill toward the pool, so an air blowout pushes water out cleanly. The slide feed pipe climbs uphill to the top of the slide. The water feature line may loop through a rock formation or a raised spillway before gravity takes over. Neither of those routes drains the way a standard return does.
The diverter valve or multi-port manifold that splits flow between the slide, the water feature, and the returns is also a freeze risk on its own. Valve bodies hold water in their chambers even when the external lines look clear, and a cracked valve body in January is an expensive repair that is entirely preventable.
Step 1: Balance Chemistry and Lower the Water Level
Before you touch the equipment pad, get your water chemistry where it needs to be for a safe winter. Target pH 7.2 to 7.4, total alkalinity 80 to 100 ppm, and calcium hardness 200 to 350 ppm. Shock the pool to bring free chlorine up to 10 to 12 ppm, then let the pump run overnight so the treated water circulates through every branch including the slide and water feature lines. That circulated shock kills any biofilm sitting in the pipes before you seal everything for five or six months.
Lower the water level to 12 to 18 inches below the skimmer for a mesh cover, or 4 to 6 inches below the skimmer for a solid cover. The exact target depends on your cover type and your local freeze depth, but you want the water line well clear of the returns and any water feature intake ports at the pool wall.
Step 2: Shut Down and Drain the Equipment
Turn off the pump and close the main shutoff valves on the suction and return sides. Open the pump drain plug and the filter drain plug and let both drain completely. If you have a heater in the loop, open its drain ports too. For a gas heater with a bypass, open the bypass valve so the heater body drains on both sides. Leave all drain plugs out and store them somewhere you will find them in spring, a zip-lock bag taped to the pump housing works well.
If your water feature uses a small recirculating pump inside a reservoir or pond basin rather than the main pool pump, drain and store that pump separately. This article focuses on the more common setup where the main pool pump handles everything through a diverter valve or dedicated valve manifold.
Step 3: Blow Out Each Line in the Right Order
This is where most mistakes happen. Pool owners blow the main returns, feel good about it, and forget the slide and feature lines still have water sitting in them. Use a shop vac on blowout mode or a compressor set to 20 to 30 PSI. Never exceed 35 PSI on vinyl-lined pools or older PVC fittings.
- Skimmer lines first. Blow from the equipment pad through each skimmer line until air bubbles steadily at the skimmer throat. Drop a Gizzmo or expansion plug into the skimmer immediately after to hold the air in and protect the skimmer body from freeze expansion.
- Main drain next. If your main drain has a winterizing plug, blow the line clear and plug it at the valve. If the main drain is a safety two-port design, blow both ports and use a rubber expansion plug sized to your pipe, usually 1.5 or 2 inches.
- Main return jets. Open each return jet port at the valve manifold one at a time, blow until you see sustained bubbles at the return eyeball in the pool wall, then plug the return with an expansion plug while the air is still flowing. Plug each one before moving to the next.
- Water feature line. Rotate the diverter or open the dedicated valve for the water feature only, close all others, and blow the feature line until air exits at the spillway or nozzle. If the feature has a check valve at its outlet, verify that it is opening during the blowout. Plug the inlet port at the pool wall or the feature basin after blowing.
- Slide feed line. This one runs uphill, so it takes longer and may need two or three passes. Open only the slide valve, blow from the pad, and watch for air at the slide discharge nozzle at the top. Because the pipe climbs several feet, residual water can drain back down between passes. Blow, wait 30 seconds, blow again. After two clean passes, plug the slide port at the equipment pad valve and add antifreeze into the line from the top of the slide if you have any doubt about the uphill section.
Step 4: Antifreeze for the Lines You Cannot Guarantee
Non-toxic propylene glycol pool antifreeze, rated to protect to at least minus 40°F, is your insurance for any line with a bend, an uphill run, or a fitting you cannot see. Use 1 quart per 20 feet of 1.5-inch pipe as a baseline. A slide feed that runs 35 feet from the pad to the top of the slide needs about 1.5 to 2 quarts after the blowout to protect bends and the low point at the base of the slide structure.
Pour antifreeze into the slide line from the top (remove the nozzle cap if accessible) and let it settle into the low points. For the water feature, pour antifreeze directly into the feature basin or reservoir and let it sit in the inlet port area. AquaDoc pool antifreeze is formulated specifically for pool plumbing in hard-freeze climates, and pool owners in freeze-prone areas use it in exactly this kind of multi-line setup where blowout alone leaves doubt. Never use automotive antifreeze: propylene glycol only, food-safe grade, in pool lines.
If you are unsure how much pipe your pool’s plumbing actually contains, the volume calculation methods described in how to calculate pool volume by pool dimensions can help you reason through pipe lengths and system size.
Step 5: Set the Valves for Winter and Cover the Pool
After blowing and plugging, set every diverter valve to the half-open position. A valve left fully closed traps water in the valve body itself. Half-open allows any moisture inside the valve housing to equalize and reduces the stress of ice expansion on the plastic or PVC housing. Label each valve position with a piece of waterproof tape so you remember the setting when you open in spring.
Cap or plug the slide nozzle at the top of the slide so debris and rainwater do not refill the line you just cleared. If the slide has a weir or overflow point at the top, seal it with a rubber cap or plug it with foam backer rod. Put your winter cover on the pool, secure the anchors or water bags, and you are done.
Common Mistakes to Avoid
- Blowing all valves open at once: When all valves are open during blowout, air takes the path of least resistance and may never fully clear the longest or highest branch. Close all but one line at a time.
- Forgetting the slide nozzle cap: An open slide nozzle at the top refills the line with every rainstorm. Even a small amount of water pooling at the base of the uphill run is enough to crack a fitting at 20°F.
- Skipping the water feature basin drain: If the basin or reservoir holds standing water near the inlet port, that water will freeze and can crack the basin walls or the port fitting. Drain or siphon the basin to below the inlet before covering.
- Using the wrong antifreeze: Automotive ethylene glycol antifreeze is toxic to pets and will contaminate pool water. Only propylene glycol rated for pool plumbing belongs in a pool line.
- Leaving valves fully closed: Every pool professional who works in a cold climate has replaced a cracked valve body that was left tightly closed for winter. Half-open is the right position.
Frequently Asked Questions
Do you need to blow out the slide line separately when winterizing an inground pool?
Yes, the slide line needs its own blowout pass because it runs uphill and holds water in the feed pipe and the slide trough. Gravity does not drain it the way a standard return jet drains, so a shop vac or compressor blowout from the equipment pad is essential. Plan on two or three passes to fully clear an uphill run before you plug the port.
How much antifreeze do you need for a pool slide line?
Plan on 1 quart of non-toxic propylene glycol antifreeze per 20 feet of 1.5-inch pipe after completing the blowout. A typical slide feed running 30 to 40 feet from the pad to the top of the slide needs about 1.5 to 2 quarts to protect bends and low points where residual water collects after blowing.
Can you use the same plug to close a water feature and a pool return on the same loop?
No. Each port needs its own expansion plug sized to fit that pipe opening, typically 1.5-inch or 2-inch. A single plug at the pump valve does not seal the individual return and feature ports at the pool wall, leaving those openings exposed to freeze damage throughout winter.
Should the diverter valve be left open or closed when closing a pool with a shared water feature pump?
Leave all diverter valves in the half-open position after blowing out and plugging every line. A fully closed valve traps residual water inside the valve body, which can crack the housing during a hard freeze. Half-open lets any remaining moisture equalize across both ports and reduces pressure from ice expansion.
What if my pool slide has a dedicated booster pump instead of sharing the main pump?
Treat it as a second independent system. Drain the booster pump completely, blow out its feed and return lines from the pump side, plug all ports at the pool wall, and store the pump indoors if temperatures will stay below 32°F for more than a day or two. The same antifreeze guidelines apply: 1 quart per 20 feet of pipe after blowing.
When one pump runs a slide, a water feature, and your main returns, winterizing it right means working through each branch individually, in sequence, with plugs ready to go in immediately after each blowout. Do that, set your valves to half-open, add antifreeze to the uphill and uncertain lines, and your plumbing will come through winter without a cracked fitting in sight.