
Winterizing an Inground Pool Heater Still Plumbed In: What to Drain, Blow Out, and Protect
Winterizing an inground pool with a heater still plumbed in requires a few extra steps beyond standard closing. You need to drain the heater body, purge the heat exchanger ports, and protect any bypass lines from freezing. This guide walks through each step with specific guidance on what to drain, how to blow out the lines, and when antifreeze is your backup plan.

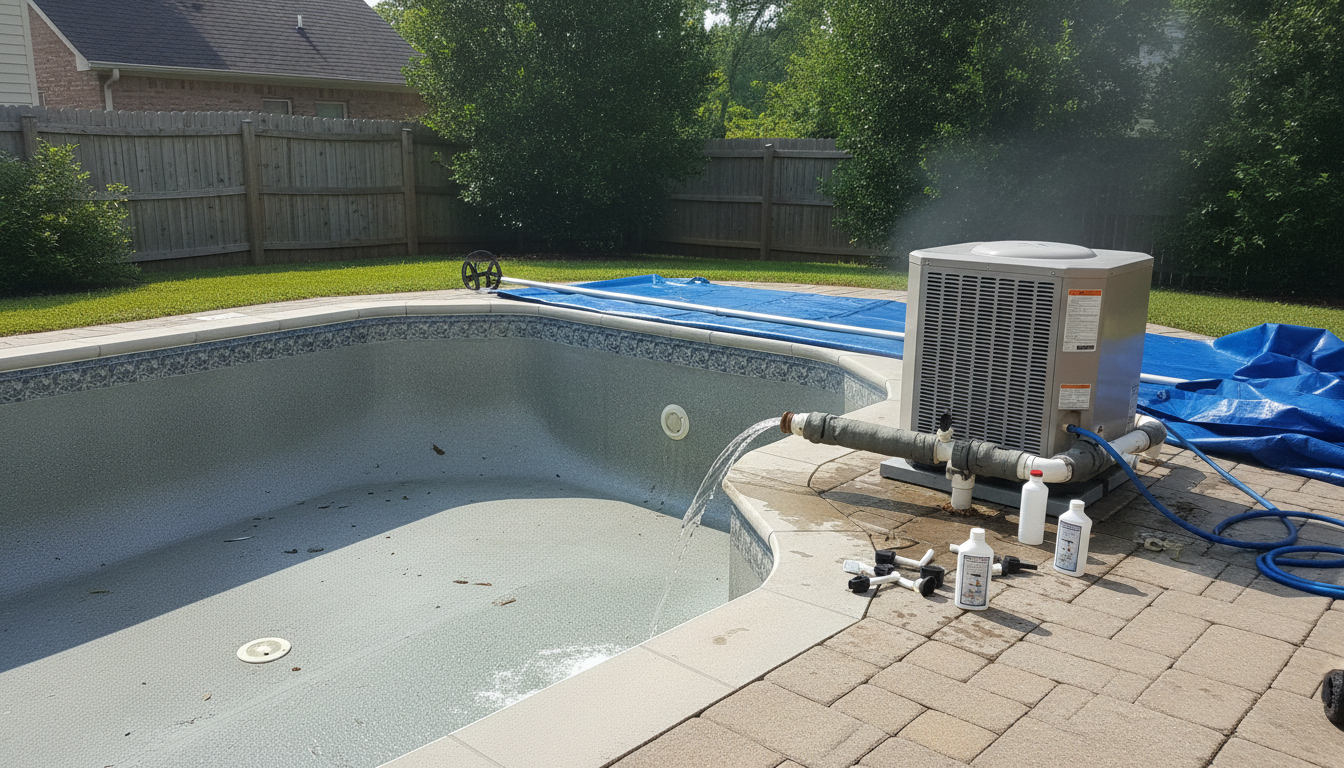
Winterizing an Inground Pool Heater Still Plumbed In: What to Drain, Blow Out, and Protect
If you’ve closed a pool before and thought the heater was just part of the plumbing loop, you’ve probably already learned that lesson the hard way. A cracked heat exchanger discovered in April is one of the more expensive surprises the off-season can hand you, and it’s almost always preventable.
Winterizing an inground pool with a heater still plumbed in means doing three things the standard closing checklist doesn’t fully cover: draining the heater body itself, blowing out the dedicated heater ports (not just the main return lines), and deciding whether the bypass line needs antifreeze or can be left empty. Do those three things correctly and your heater will be fine. This article walks through each step in order, with real numbers for air pressure, antifreeze volume, and what to look for when you’re done.
Why a Plumbed-In Heater Is a Special Case
A heater that stays physically in the plumbing loop over winter has water sitting inside it at close. Unlike a filter or pump, a heater’s heat exchanger is full of narrow copper or polymer tubes, and water in narrow spaces expands with almost nowhere to go when it freezes. The result is a cracked exchanger. Gas heater exchangers run $300 to $700 to replace; heat pump exchangers often run $500 to $1,000 – plus labor if you hire a pro. The heater’s outer body and manifold fittings are also at risk if water pools there. Winterizing your pool heater properly takes about 20 extra minutes but completely eliminates that risk.
A pool with a bypass line adds one more layer. Most heater installations include a bypass valve arrangement so you can route flow around the heater when it’s not in use. That bypass section holds standing water too, and it’s easy to forget because it’s not the heater itself. Both the heater body and the bypass loop need to be emptied or protected.
Before You Start: What You Need On Hand
- Air compressor or shop vac: You need at least 45 PSI to move water reliably through pool plumbing. A shop vac on blow mode works on shorter runs; a compressor is more reliable for anything over 20 feet.
- Drain plug or port key: Most gas heaters (Pentair MasterTemp, Hayward H-Series) have a dedicated 1/4-inch or 3/8-inch drain plug at the base of the heat exchanger manifold. Check your heater’s manual for its location before you start.
- Pool-grade propylene glycol antifreeze: Needed only as a backup for lines you can’t fully empty. Have at least 1 gallon on hand. Never use automotive antifreeze – it’s ethylene glycol and toxic to swimmers.
- Winterizing plugs for return jets and skimmers: Standard closing gear you likely already own.
- Rag or bucket: The heater drain will release a couple of quarts of water. Have something ready to catch it.
Step 1: Balance the Water and Shock Before Anything Else
Close with balanced water – pH between 7.2 and 7.6, alkalinity between 80 and 120 ppm, and calcium hardness between 180 and 220 ppm. Closing with low pH or low calcium causes the water that lingers in the heater’s metal fittings and manifold to become corrosive over winter, pitting copper and corroding brass. Add your closing shock dose the night before you drain and blow out lines, so the sanitizer has time to work before the water drops below the skimmer. If you’re unsure about your shock approach going into the close, our guide on what goes wrong with pool shock covers the most common dosing and timing mistakes that can leave you starting spring with a chemistry problem.
Step 2: Run the Heater Off and Let It Cool Completely
Turn the heater to off – not just the thermostat down, but the actual power or gas supply. For a gas heater, shut off the gas valve at the unit. For a heat pump, switch it off at the breaker. Let it sit for at least 30 minutes. Draining a heater that’s still warm isn’t dangerous to you, but residual heat in the heat exchanger can create steam pressure in a sealed line if you cap things too quickly. Letting it cool fully also gives any condensation inside the cabinet a chance to settle so you can see clearly where the drain port is.
Step 3: Drain the Heater Body
Locate the drain plug or petcock at the lowest point of the heater manifold. On most Pentair and Hayward gas heaters, this is a plastic or brass plug on the underside of the inlet/outlet manifold, sometimes hidden behind the front access panel. Remove it and let the water drain completely into your bucket – expect 1 to 3 quarts depending on your heater model. For heat pump heaters, there’s often a separate drain port on each side of the refrigerant coil housing; check your owner’s manual because the locations vary more than on gas units. Detailed steps for winterizing a pool heater by type are worth bookmarking if you have an older unit without a clear drain port marked in the manual.
Once the water stops draining, use a compressor at 45 to 60 PSI through the inlet port (with the outlet capped or directed away) to push any remaining water out through the drain opening. You’ll see a mist of fine droplets for a few seconds, then dry air. That’s your confirmation the exchanger is clear. Replace the drain plug hand-tight – don’t overtighten plastic plugs or you’ll crack the manifold on the first spring startup.
Step 4: Blow Out the Heater’s Plumbing Connections
The heater connects to the main plumbing loop at two points: the inlet (coming from the filter) and the outlet (returning to the pool). Even after you drain the heater body, the short pipe stubs connecting it to the loop hold water. These need to be blown out along with the rest of your return lines.
Work from the equipment pad back toward the pool: close the bypass valve so flow is directed through the heater, blow out from the pump pot toward the returns, and make sure you see water being pushed through both the heater inlet and outlet connections before you see air. Then open the bypass valve and repeat so air runs through the bypass run as well. The goal is no standing water in any section of the loop. For a full picture of the inground closing sequence that surrounds these heater steps, this walkthrough of how to winterize an inground pool covers the broader process clearly.
Step 5: Handle the Bypass Line
The bypass line is usually a 1.5 or 2-inch PVC section, 3 to 8 feet long, that routes water around the heater when the bypass valve is open. It holds a small volume – typically less than half a gallon – but that’s enough to crack a fitting. Blow it out the same way you would any return branch: apply compressor air at the pump end with the bypass valve open, and confirm the section runs dry. If the bypass line has a low spot or a union fitting that traps water and you can’t fully empty it with air, pour in 1 quart of propylene glycol pool antifreeze and leave it there for the winter. One quart is more than enough for a standard bypass run. Winterizing a heat pump heater in particular often involves this step because heat pump bypass configurations tend to have more fittings and low spots than gas heater plumbing.
Step 6: Protect the Heater Cabinet and External Components
Once everything is drained and blown out, there are a few physical steps worth taking before you walk away for the season. Remove the heater’s pressure switch if it’s serviceable and store it inside – pressure switches can crack in hard freezes. Stuff the exhaust flue of a gas heater loosely with a rag or mesh screen to keep mice and insects out; remove it in spring before startup. For heat pumps, leave the unit uncovered (heat pumps need airflow even in storage) but make sure no cover or debris can block the fan housing. Keep the electrical disconnect locked out for the season.
AquaDoc’s pool closing chemical kits include a pre-measured winter algaecide dose sized for common inground volumes, which is worth adding to the pool water the same day you do your blow-out, so the chemistry is set before you put the cover on. If you want to make sure your pre-close maintenance is solid before you get into the heater steps, the checklist in our fall pool maintenance guide is a good place to start.
A Worked Example: 20,000-Gallon Pool, Gas Heater, Standard Bypass
Say you have a 20,000-gallon inground pool with a Pentair MasterTemp 400 on a standard three-valve bypass. The heater body holds about 2.5 quarts of water at the manifold. You drain it through the manifold plug, blow through the inlet port at 50 PSI for 15 seconds until air runs clear, then replace the plug. You blow out the return lines from the pump pot with the bypass valve closed (forcing air through the heater connections), then open the bypass valve and blow through that section too. Total extra time compared to closing a pool with no heater: about 20 minutes. The bypass line on this setup is a straight 4-foot run with no low spots, so it blows completely dry without needing antifreeze. You need zero additional antifreeze for the heater itself – the drain and blow-out handles it completely. For reference on how pool volume affects chemical calculations throughout the season, see how pool gallons affect every chemical dose.
For more detail on protecting all the equipment at the pad together, protecting your pump, filter, and heater as a system is a practical reference for the full equipment pad winterization.
Frequently Asked Questions
Do you have to drain a pool heater when closing the pool for winter?
Yes. Any standing water left inside the heater body or heat exchanger can freeze, expand, and crack the heat exchanger – a repair that typically costs $400 to $800 or more in parts alone. Drain the heater completely before temperatures drop below 32°F.
Can you blow out pool lines with the heater still connected?
Yes, but you need to blow through the heater’s drain ports separately, not rely on main line pressure to push water out through the narrow exchanger tubes. Use a compressor at 45 to 60 PSI on the dedicated heater drain port or inlet, and confirm water stops flowing before you cap anything.
How much antifreeze do you need for a pool heater bypass line?
A single bypass line (typically 1.5 to 2 inches in diameter, 3 to 6 feet long) holds less than half a gallon of water. One quart of pool-grade propylene glycol antifreeze is enough to protect it, but blowing the line completely dry is always the preferred first step before reaching for antifreeze.
What happens if you forget to winterize a plumbed-in pool heater?
If water freezes inside the heat exchanger, it cracks the copper or polymer tubes and the heater will leak when you start up in spring. Replacement heat exchangers run $300 to $700 for gas heaters and $500 to $1,000 for heat pumps, plus labor. The manifold fittings and pressure switch can also crack, adding to the repair bill.
Should you use antifreeze in pool heater lines or just blow them out?
Blowing lines dry with a compressor at 45 to 60 PSI is the better method and is fully sufficient for most plumbed-in heaters that have accessible drain ports. Use propylene glycol antifreeze only as a backup in lines you cannot fully empty due to low spots or complex fitting configurations – never automotive antifreeze, which is ethylene glycol and toxic.
The short version: drain the heater body through its manifold drain port, blow out the heater’s plumbing connections and bypass line at 45 to 60 PSI, and use propylene glycol antifreeze only if a section won’t blow dry. Those three steps are what separate a heater that starts up fine in April from one that needs a new heat exchanger before you can open the pool.