
Sand Filter Winterization for Above-Ground Pools: Step-by-Step
Winterizing an above-ground pool with a sand filter takes about two hours if you follow the right order. This guide walks through every step, from final backwash to antifreeze amounts, so your equipment survives the freeze without cracking or clouding up in spring.

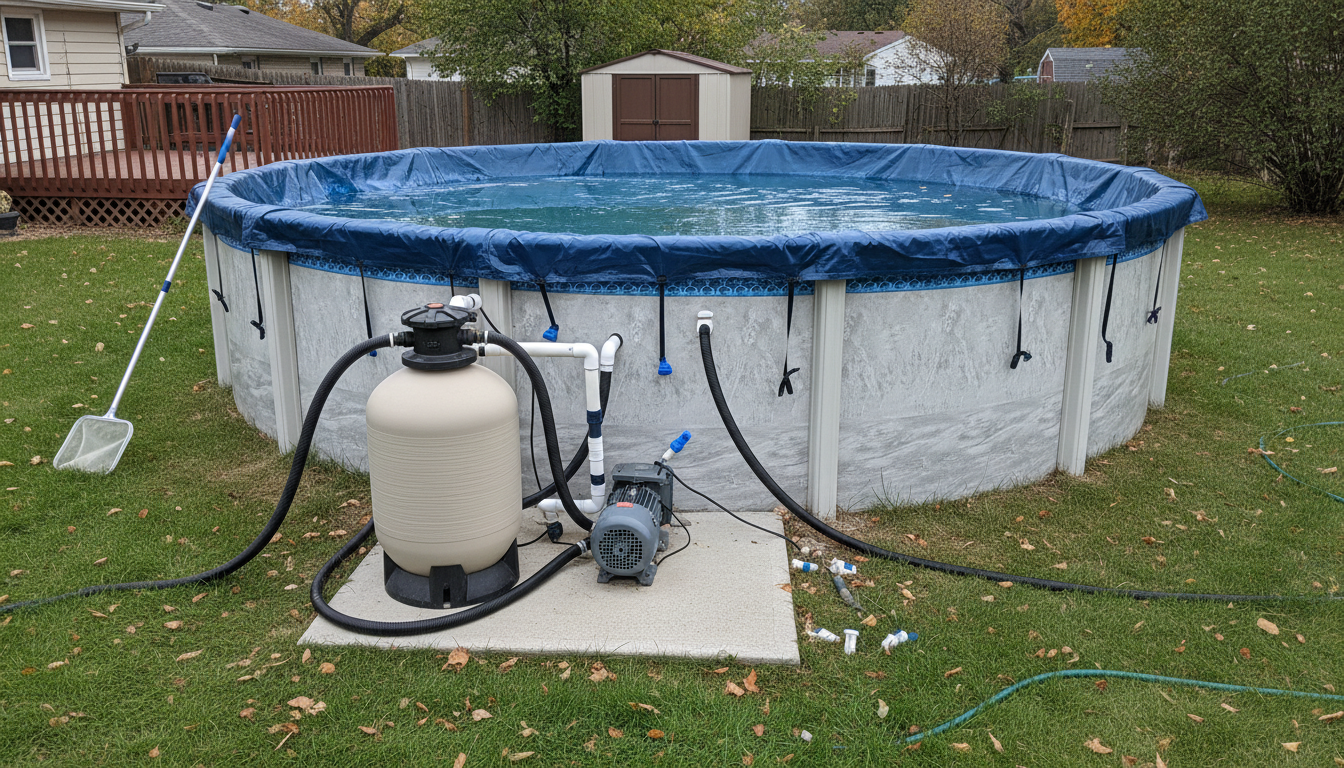
Sand Filter Winterization for Above-Ground Pools: Step-by-Step
If you have ever stared at your sand filter in late September wondering whether you can just unplug everything and throw a tarp over the pool, you are not alone. It is tempting, but a rushed close almost always means a cracked pump housing, a green swamp in April, or a multiport valve that leaks as soon as you open back up.
The short answer is this: winterizing an above-ground pool with a sand filter means balancing the water chemistry, shocking the pool, draining and backwashing the filter, clearing all plumbing lines of standing water, and installing a winter cover – in that order. Skip a step or reverse two of them and you pay for it in spring. This guide walks through each stage with specific numbers so you know exactly what to do and why.
What You Need Before You Start
Gather everything before you touch the filter valve. Running back to the store mid-close is how steps get skipped.
- Test kit or test strips: You need actual numbers, not a guess. Test pH, total alkalinity, calcium hardness, and chlorine at minimum.
- pH reducer or increaser: Target pH 7.4 to 7.6 for closing.
- Alkalinity increaser: Target 80 to 120 ppm going into winter.
- Calcium hypochlorite shock: 68% available chlorine, enough for 2 lbs per 10,000 gallons.
- Pool algaecide: A winter-formula polyquat algaecide, dosed per the label for your gallonage.
- Non-toxic pool antifreeze: Propylene glycol based. Budget 1 quart per 10 linear feet of 1.5-inch pipe.
- Air compressor or shop vac: For blowing out the plumbing lines.
- Winter cover and cover clips or cable: Sized to your pool.
- Expansion plugs: One per return fitting and skimmer port.
Step 1: Balance the Water Chemistry
Test the water at least 48 hours before closing so you have time to correct anything. Balanced water going into winter protects your liner, your plumbing, and the sand media itself. Unbalanced water – especially water with low pH – will corrode metal components and etch the surfaces sitting under a cover all winter with no circulation to dilute the damage.
Target these ranges for closing: pH 7.4 to 7.6, total alkalinity 80 to 120 ppm, calcium hardness 175 to 225 ppm (for vinyl liner pools, the lower end of that range is fine). If your cyanuric acid is above 80 ppm at closing, partially drain and refill before shocking, because high CYA will block your shock from working. Once chemistry is in range, you are ready to shock.
Step 2: Shock the Pool the Night Before Closing
Shock the evening before your closing day, not the morning of. Calcium hypochlorite shock needs 8 to 12 hours to work through the water, and you want the chlorine to drop back below 5 ppm before you put a cover on. Trapping high chlorine under a winter cover bleaches and degrades the material within weeks.
Use 2 lbs of calcium hypochlorite shock per 10,000 gallons. Say your pool is a 15-foot round with a 4-foot wall depth, which holds approximately 5,300 gallons. That means 1 lb of shock is the right dose. A 24-foot round at 4.5 feet deep holds about 13,600 gallons, so you need roughly 2.75 lbs. Pre-dissolve the granules in a 5-gallon bucket of pool water before pouring slowly around the perimeter – never dump dry shock directly onto a vinyl liner. Add your winter algaecide at the same time, but pour it on the opposite side of the pool from the shock so they do not neutralize each other before they mix in.
Step 3: Lower the Water Level
For an above-ground pool with a skimmer, drop the water level 4 to 6 inches below the skimmer opening. You do not need to drain the pool nearly as low as some people think. The goal is simply to keep water from sitting in the skimmer body and freezing. If you are using an above-ground pool winter skimmer plate (a plastic disc that seals the skimmer from inside), you can leave the water level where it is, but the plate must seat tightly. For more detail on where exactly to land the water level, understanding how your filter system moves water helps you plan the drain step efficiently alongside the next stage.
Step 4: Backwash and Rinse the Sand Filter
This is the step most people rush, and it matters a lot. You are leaving that sand media to sit stagnant for 4 to 6 months. If you close with dirty, debris-laden water in the tank, you are giving algae a head start on next season. Properly winterizing a sand filter starts with a thorough backwash, not just a quick 60-second run.
- Set the multiport valve to Backwash.
- Run the pump until the sight glass or waste discharge line runs clear – typically 2 to 3 minutes.
- Turn the pump off, set the valve to Rinse, and run for 30 seconds. This reseats the sand bed so it does not channel when you open next spring.
- Turn the pump off again before switching valve positions. Moving the valve while the pump runs damages the gasket inside the valve body.
After the rinse, shut down the pump. Now drain the pump housing completely – most pumps have a drain plug at the bottom of the volute. Remove it and let every drop of water out. A pump housing with even a cup of trapped water will crack in a hard freeze. Store the drain plug in the pump basket so you do not lose it over winter. For a deeper look at backwash technique, winterizing your pool filter the right way covers the process well.
Step 5: Drain and Prep the Filter Tank
Locate the drain cap or plug at the bottom of your sand filter tank and remove it. Most above-ground sand filters drain completely by gravity in 5 to 10 minutes. Do not force-blow the tank dry with an air compressor – you can dislodge the laterals at the bottom of the tank, which is an expensive repair. Let gravity do the work.
Once drained, remove the pressure gauge from the top of the tank and store it inside. Pressure gauges crack in freezing temps because the Bourdon tube inside holds a small amount of water. A replacement gauge costs $15 to $30, but it is an annoying mid-season repair you can simply avoid.
Set the multiport valve to the Winterize position. If your valve does not have a dedicated Winterize setting, split it halfway between two positions so the internal spider gasket does not seal against any port. A sealed port traps any residual water with nowhere to expand when it freezes. Closing an above-ground pool for winter consistently highlights this valve position step as one of the most commonly missed.
Step 6: Blow Out and Antifreeze the Plumbing Lines
Disconnect the hoses between the pool, pump, and filter. Most above-ground pool plumbing uses flexible hose connectors, so this is usually four hose clamps and two minutes of work. Store the hoses indoors if possible – UV and freeze-thaw cycles crack flexible hose within a few seasons if left outside.
For any hard-plumbed above-ground pools with PVC pipe runs, blow out each line with an air compressor set to 30 to 50 PSI, then follow with a dose of non-toxic propylene glycol antifreeze – about 1 quart per 10 feet of 1.5-inch pipe. Pour it into the skimmer throat so it travels down the suction line. Never use automotive antifreeze, which contains ethylene glycol and is toxic. AquaDoc makes a propylene glycol pool antifreeze that pool owners use for exactly this step – non-toxic, pre-measured, and rated to -40F. Install expansion plugs in each return fitting and in the skimmer port to seal them off. Winterizing your pool filter system has a useful walkthrough on antifreeze quantities if your setup has more than two lines.
Step 7: Install the Winter Cover
Skim the surface one last time to remove leaves and debris before covering – a clean surface under the cover means less organic load breaking down over winter and feeding algae. Lay the cover over the pool and secure it with the cable and winch system or cover clips, depending on your cover type. The cover should be tight enough that wind cannot billow it, but not so tight that it cannot accept a small amount of rainwater or snowmelt without tearing. A cover pump or submersible pump set on a timer handles excess water accumulation over winter without you needing to check it every week.
Sand Filter vs. Other Filter Types: Winterization Comparison
| Filter Type | Drain Method | Internal Media Storage | Main Freeze Risk | Winterization Time |
|---|---|---|---|---|
| Sand Filter | Gravity drain via bottom plug | Sand stays in tank year-round | Laterals if tank is not fully drained | 20 to 30 minutes |
| Cartridge Filter | Drain plug plus remove cartridge | Cartridge stored indoors | Cartridge element cracking if left in | 15 to 20 minutes |
| DE Filter | Drain plug plus backwash to remove DE | DE powder flushed out, grids stay | Grid cracking if water remains | 25 to 40 minutes |
The sand filter is the most forgiving of the three for winter storage because the media itself – silica sand – is not damaged by freezing. The vulnerability is always the hard components: the tank body, the laterals, the multiport valve, and the pump. Drain those completely and you are in good shape.
Common Mistakes to Avoid
- Moving the multiport valve while the pump is running: This tears the spider gasket inside the valve body, causing leaks next season. Always kill the pump first.
- Leaving the pressure gauge on the tank: The gauge will crack. Remove it, store it inside, reinstall in spring.
- Shocking and covering the same day: Wait for free chlorine to drop below 5 ppm before covering, or your cover material will degrade within one season.
- Skipping the algaecide: Shock alone does not prevent algae all winter. A polyquat algaecide at closing gives you a second line of defense for the months when nothing is circulating.
- Not checking the cover midwinter: Heavy snow or pooled water can collapse some covers or pull them into the pool. A quick check after each major storm takes two minutes and prevents a much bigger problem.
Frequently Asked Questions
Do you need to add antifreeze to an above-ground pool sand filter?
Yes, if you cannot fully drain the filter tank and all connected plumbing. Add 1 quart of non-toxic propylene glycol pool antifreeze per 10 feet of 1.5-inch pipe. Never use automotive antifreeze, which contains ethylene glycol and is harmful to swimmers and pool surfaces.
How much shock do you add when closing an above-ground pool?
Add 2 lbs of calcium hypochlorite shock (68% available chlorine) per 10,000 gallons. A standard 15-foot round above-ground pool holds roughly 5,300 gallons, so about 1 lb of shock is the right closing dose for that size. A 24-foot round holds about 13,600 gallons and needs approximately 2.75 lbs.
Should you backwash a sand filter before closing the pool for winter?
Yes, always backwash before winterizing. Run the backwash cycle until the sight glass or waste line runs clear – typically 2 to 3 minutes – then do a 30-second rinse cycle before shutting down. Leaving dirty water in the sand over winter gives algae a 5-month head start before you even open the cover.
What position should you leave the sand filter valve on for winter?
Set the multiport valve to the Winterize position if your valve includes one. If it does not, leave it halfway between two positions so the spider gasket does not seal any port shut and trap expanding ice inside the manifold. Never leave it locked in Filter, Backwash, or any other sealed position.
How do you winterize a 15-foot round above-ground pool with a sand filter?
Balance your chemistry to pH 7.4 to 7.6 and alkalinity 80 to 120 ppm, then shock the pool the night before closing. Lower the water 4 to 6 inches below the skimmer, backwash and rinse the filter, drain the pump housing and filter tank, blow out or antifreeze the plumbing, set the multiport valve to Winterize, install expansion plugs in all fittings, and cover the pool. The whole process takes 1.5 to 2 hours.
Winterizing an above-ground pool with a sand filter comes down to one rule: remove all standing water from every component that can freeze and crack. Do that in the right order, balance your chemistry first, and your equipment will be ready to run the day you pull the cover off next spring.